Let’s be honest — the garage is the forgotten room of the smart home.
People will spend weeks debating which smart thermostat to buy, then
completely ignore the biggest motorized door in their house. Most “smart
garage” setups are just a MyQ hub that disconnects from Wi-Fi every
other week and charges you a subscription to close your own door. That’s
not smart. That’s a hostage situation.
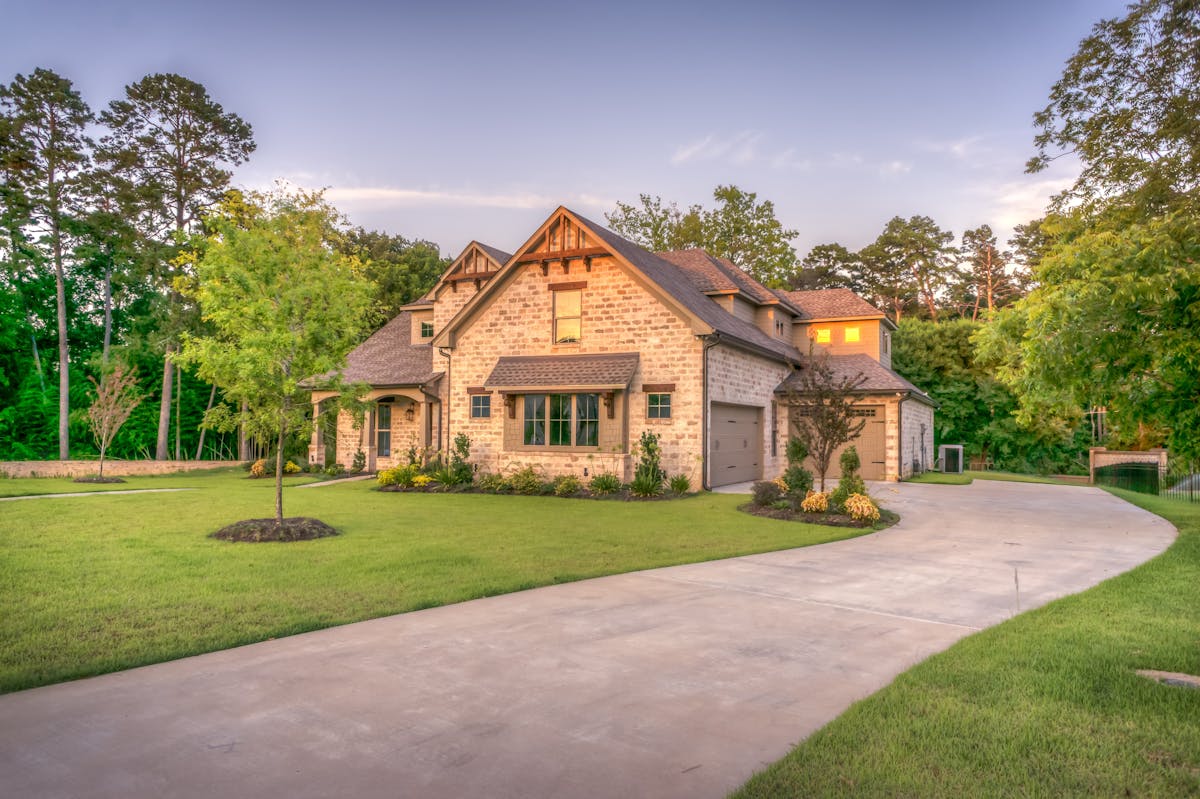
Here’s the thing: your garage is actually one of the easiest and most
rewarding rooms to automate. It’s got big, obvious automations — is the
door open? Is someone in there? Did I forget to close it when I left? —
that make a real difference in your daily life. And because garages are
simple, mostly-ignored spaces, the automations are straightforward and
reliable. No finicky lighting scenes or multi-room orchestration
required.
This guide isn’t just about which smart opener to buy (we’ve already
covered that in our smart
garage door openers guide). This is about building a garage that
actually works as part of your smart home — cameras that show you who’s
coming and going, sensors that alert you when the door’s been open too
long, lighting that turns on before you fumble for the switch, and
automations that tie it all together. Let’s build something that earns
the “smart” label.
What You Need Beyond
Just a Smart Opener
A smart opener is a good start, but it’s like having a smart lock on
your front door and nothing else. You know if the door is
locked, but you can’t see who’s at it, can’t turn on the porch light
automatically, and can’t set up a routine that locks the door when you
leave. Same problem in the garage.
Here’s what a genuinely smart garage setup includes:
- A camera — to see who’s coming and going, check on
packages, and verify the door actually closed - A door sensor — to know the open/closed state
reliably (not just “the opener received a command”) - Smart lighting — motion-activated or scheduled,
because walking into a dark garage is how you trip over a bicycle - Temperature/humidity monitoring — because extreme
heat or cold can damage paint, chemicals, batteries, and anything else
you’re storing out there - An automation hub — Home Assistant, Alexa, or
Google Home to tie everything together into routines that actually
run
Individually, none of these are expensive or complicated. Together,
they turn your garage from “that room with the Wi-Fi door thing that
never connects” into the most automated space in your house. Let’s go
through each piece.
Smart Garage
Camera: Tapo C120 (Under 35 Dollars)
If you’re only adding one device to your garage, make it a camera.
Not for security paranoia — for actual utility. You want to see if the
door closed when you drove away. You want to check if a package arrived.
You want to know if the neighbor’s cat got in again.

The TP-Link Tapo C120 is the camera I’d recommend
for most garages, and it’s not even close. At around $30, it
delivers:
- 2K QHD resolution — clear enough to read a license
plate or see what’s on a shelf - Starlight night vision — full color in
near-darkness, which matters because garages are often dim - IP66 weatherproofing — handles temperature extremes
and dust better than indoor-only cameras - Local microSD storage — no subscription required,
unlike Ring or Nest cameras - Motion detection with person/vehicle/pet
recognition — reduces false alerts from shadows and bugs - Two-way audio — tell the dog to get off the car, or
tell the delivery driver where to put the package
Check
current pricing on Amazon
The big advantage over a smart doorbell camera in this
context: the C120 lives inside the garage, pointing at the door
and the interior. A doorbell camera only sees what’s right outside. You
want coverage of the whole space — the door, the cars, the storage
shelves.
Setup is dead simple with the Tapo app, and it integrates with Alexa
and Google Home for voice viewing (“show me the garage camera”). If
you’re running Home Assistant, there’s a Tapo integration that gives you
full local control without cloud dependency.
Budget alternative: The Tapo C110
(around $20) drops to 1080p and loses the weatherproofing, but works
fine for an insulated, temperature-controlled garage.
Garage
Door Sensor: Tailwind iQ3 Smart Garage Controller
Knowing whether your garage door is open or closed is the foundation
of every garage automation. And here’s the dirty secret of most “smart
garage” products: they don’t actually sense the door state. They sense
whether the opener received a command. That’s a huge difference. “I told
it to close” is not the same as “it closed.”
The Tailwind iQ3 is the best garage door
controller/sensor combo on the market right now, and it’s not
particularly close. Here’s why:
- Physical door sensor — an actual magnetic contact
sensor on the door rail, so you know the real state - No subscription — free app, free notifications,
free scheduling. MyQ’s competitor charges $30/year for the same
features - Geofencing built-in — automatically closes the door
when you drive away (works with both iOS and Android) - Works with ALL major opener brands — Chamberlain,
LiftMaster, Genie, Craftsman, Sommer, Overhead Door - Home Assistant native integration — local control,
no cloud dependency for automations - Dual door support — one controller handles two
garage doors
Check
current pricing on Amazon
At around $80-90, it’s more expensive than the MyQ hub, but you make
that back in the first year by not paying the subscription. And it
actually works with Home Assistant, Alexa, and Google Home — MyQ
famously broke their third-party integrations and then had the nerve to
charge for their own app features.
If you already have a smart opener and just need a sensor, the
Govee Wi-Fi Door Sensor (around $20) is a simpler
option. It just reports open/closed state to the Govee app and
integrates with Alexa and Google Home. Less capable than the Tailwind,
but cheap and reliable for basic “is the door open?” monitoring.
Check
Govee door sensor pricing
Smart
Garage Lighting: Sengled or Philips Hue Outdoor
Garage lighting is one of those things you don’t think about until
you’re fumbling for the pull-chain in the dark while holding groceries.
Smart lighting fixes this permanently.
For most garages, I’d go with Sengled Smart LED
bulbs — they’re cheap, they work, and you don’t need a hub if
you’re fine with Wi-Fi control:
- Sengled Smart Wi-Fi bulbs (around $15-20 each) —
connect directly to your Wi-Fi, no hub needed - Motion automation — set them to turn on when the
garage door opens or when the camera detects a person - Scheduling — dim to 30% at 10 PM so you’re not
blinding yourself on a midnight snack run - Color temperature — set to cool white (4000-5000K)
for working in the garage, warm white for quick trips
Check
Sengled smart bulbs on Amazon
If you’re already in the Philips Hue ecosystem, the Hue
Outdoor Floodlight or Hue White Ambiance bulbs
are the premium pick. They need the Hue Bridge, but they’re rock-solid
reliable and integrate with everything. At $25-30 per bulb plus the
bridge cost, they’re overkill unless you’re already Hue-invested.
Check
Philips Hue outdoor lighting
The real magic comes from automating the lights — not just
controlling them from an app. More on that in the Home Assistant section
below.
Garage
Temperature Monitoring: Govee or SwitchBot Sensors
Here’s something most smart home guides never mention: your garage
might be the worst environment in your house for the things you store in
it. In summer, an uninsulated garage can hit 130°F+ — hot enough to
degrade paint, melt candles, warp sporting equipment, and reduce battery
life on everything from power tools to emergency flashlights. In winter,
extreme cold can crack electronics and freeze liquids you forgot were
out there.

A Govee Wi-Fi Temperature and Humidity Sensor costs
about $15 and gives you:
- Real-time temperature and humidity monitoring via
the Govee app - Push alerts when temps exceed your thresholds
(e.g., above 100°F or below 32°F) - Data history — track patterns over days and
weeks - Alexa and Google Home integration — “what’s the
garage temperature?”
Check
Govee temperature sensors on Amazon
For Home Assistant users, the SwitchBot Temperature and
Humidity Sensor with the SwitchBot Hub is even better — it
integrates directly into Home Assistant via local API, so your
temperature automations work without cloud dependency. Around $20 for
the sensor, $35 for the hub.
Check
SwitchBot sensors on Amazon
What do you do with temperature data? Set up automations like:
- Alert your phone if garage temp exceeds 110°F (time to check on
stored items) - Turn on a smart plug with a fan if the garage gets above 95°F
- Send a warning if humidity drops below 20% (static electricity risk)
or spikes above 70% (mold risk)
Home
Assistant Integration: The Brains of Your Smart Garage
This is where your garage goes from “a few smart devices with apps”
to an actually smart space. Home Assistant is the free, open-source home
automation platform that ties everything together, and your garage is
the perfect starter project for it.
If you haven’t set up Home Assistant yet, our smart home automations
guide walks through the basics. But here’s what matters for your
garage specifically:
Connecting Your Devices
The Tailwind iQ3 has a native Home Assistant
integration — add it through Settings → Devices & Integrations,
enter your Tailwind credentials, and you get the garage door as a
controllable entity immediately. No cloud dependency for basic
open/close commands.
For the Tapo C120 camera, install the
tapo integration in Home Assistant. You’ll get a camera
entity for live viewing, plus motion detection sensors you can use in
automations.
Govee sensors connect via the Govee integration or,
for local control, via Bluetooth using the govee custom
component. SwitchBot sensors connect through the
SwitchBot integration with the Hub.
Sengled/Hue bulbs already integrate natively —
they’ll appear as light entities you can control from any
automation.
Essential Garage
Automations in Home Assistant
Here are the automations that make the biggest daily impact:
Auto-close after 30 minutes: When the garage door
has been open for 30 minutes, automatically close it and send a
notification. Adjust the time threshold based on how you use your garage
— maybe 15 minutes for security-conscious folks, maybe 60 minutes if
you’re frequently working in there.
Leave-home geofencing: When your phone (and your
partner’s phone) leave the home zone, check if the garage door is open.
If it is, close it and send a confirmation notification. No more “did I
close the garage?” anxiety.
Nightly security check: At 10 PM every night, check:
is the garage door open? If yes, close it and notify. Are the garage
lights on? Turn them off. Simple, reliable, and it means you’ll never
wake up to find the garage has been wide open all night.
Motion-activated lighting: When the garage camera
detects a person OR the garage door opens, turn on the garage lights.
After 10 minutes of no motion, turn them off. No more fumbling in the
dark.
Temperature alerts: When garage temperature exceeds
your threshold, send a push notification. If you have a smart plug with
a fan or heater, you can automate that too.
Security Considerations
Your garage door controller can open your garage remotely — that’s
powerful, and it needs protection. Check our guide on how to secure your smart home from
hackers for the full rundown, but the key points:
- Use strong, unique passwords for every device and service
- Keep your Home Assistant instance behind a VPN, not exposed directly
to the internet - Enable two-factor authentication on your Tailwind/Govee
accounts - Update firmware regularly — set a monthly reminder if your devices
don’t auto-update - Consider keeping your garage door sensor on a separate VLAN from
your main home network if you’re networking-savvy
Full
Automation Example: The “Leaving Home” Routine
Let’s put it all together. Here’s what a complete “leaving home”
routine looks like when your garage is properly integrated:
Trigger: Both phones leave the home zone (geofencing
via Home Assistant or your phone’s location)
What happens, in order:
- Garage door closes — if it’s open, Tailwind closes
it. If it’s already closed, this step is skipped. - Garage lights turn off — Sengled/Hue bulbs switch
off. No wasted electricity. - Security camera arms — Tapo C120 switches to active
monitoring mode with person detection alerts. - Front door locks — if you have a smart lock, it
locks automatically. - Security system arms — if you have a smart security
system (Ring, Simplisafe, etc.), it arms to “away” mode. - Confirmation notification — “You’ve left home.
Garage closed, lights off, security armed.”
Arrival routine (when you pull into the
driveway):
- Garage door opens — geofencing or the Tailwind
auto-open feature detects your approach. - Garage lights turn on — you’re not walking into a
dark space. - Front door unlocks — if you have a smart lock.
- Indoor lights turn on — “welcome home” scene in
your living areas. - Security system disarms — if applicable.
This is what “smart garage” should feel like. Not opening an app and
tapping a button. Not waiting for a cloud server to respond. Just…
things happening automatically because you set them up once and they
work every time.
The beauty of this setup is that each piece works independently too.
The camera still records motion even if Home Assistant is down. The
temperature sensor still alerts you even if your automations are off.
You’re building redundancy, not creating single points of failure.
Conclusion: Recommended
Setups by Budget
Under 50 dollars (sensors only): – Govee
temperature/humidity sensor ($15) – Govee Wi-Fi door sensor ($20) –
Total: ~$35
This gets you awareness — you’ll know if the door is open and if the
garage is too hot. No remote control, no camera, but the most critical
information for the least money.
Under 150 dollars (sensors + camera): – Tapo C120
camera ($30) – Govee door sensor ($20) – Govee temperature sensor ($15)
– Sengled Smart Wi-Fi bulbs x2 ($30) – Total: ~$95
You can see what’s happening, know the door state, monitor
temperature, and control the lights. Add automations through the Alexa
or Google Home app for basic routines.
Under 250 dollars (full setup): – Tapo C120 camera
($30) – Tailwind iQ3 smart garage controller ($85) – Govee temperature
sensor ($15) – Sengled Smart Wi-Fi bulbs x2 ($30) – Total: ~$160
This is the sweet spot. Full door control with real sensing, camera
coverage, lighting automation, and temperature monitoring. Works with
Alexa, Google Home, or Home Assistant.
Premium setup (350+ dollars): – Tapo C120 camera
($30) – Tailwind iQ3 ($85) – SwitchBot Hub + Temperature Sensor ($55) –
Philips Hue White Ambiance bulbs x2 + Hue Bridge ($90-120) – Home
Assistant Green or Yellow hub ($70-150) – Total: ~$330-440
Full local control, no cloud dependency, premium lighting, and the
foundation for expanding automation throughout your entire home. If
you’re going to go deep on smart home, start here.
The garage is the easiest room in your house to automate. It’s got
obvious problems (dark, open door, temperature extremes) with obvious
solutions (lights, sensor, thermometer). Start with the budget setup,
prove to yourself that it’s useful, and upgrade from there. Just don’t
settle for a MyQ hub and call it done — your garage deserves better.